
Main Index
In Store
Our Web Store
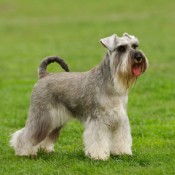
Miniature Schnauzer Picture Gallery
Latest Dog Blogs
- What Are The Basic Commands To Train A Dog?
- PaySafe As The Most Popular Type Of Deposit
- Everything You Need To Know About Pet Sales
- Dogs Contribute To Our Physical And Mental Well Being
- How To Choose Where To Bet On Greyhounds In 2022
- Volunteer With Animals - How To Help Dogs Around The World
- Basic Understanding Of The House Edge
- Why You Should Get A Dog
- Top 20 Popular Dog Names Around The World
- Constipation in Dogs and How to Find Solutions

How To Draw A Portrait Of Your Pet?
- 14/09/2020

Whether you’re an experienced artist or a beginner looking to tackle a new idea, drawing is often a process of skill, time, and dedication. After all, not everyone has the natural ability to put pencil to paper and walk away with a masterpiece. If you’re looking to create a portrait of your pet, it’s even more important to get everything right – after all, you know this pet better than anyone else! Before grabbing a piece of paper and some pencils, here are a few tips to help your pet project along:
Make Sure You Have the Right Materials
Before you attempt to create a portrait of your pet, spend a few minutes considering what you’d like to use as a medium. There are several options in terms of drawing: pastels, pencil, charcoal, ink, and watercolor pens – just to name a few. Each of these mediums will require a different weight for paper.
Dry items like pencil and pencil crayon can use any variety of paper, from printer paper to a thicker weight. Try experimenting with a few different styles of paper to see what you enjoy working with the best.
Wet items like ink, watercolor pens, and paints require a heavy paper to absorb the water from the picture. You’ll want to experiment with different weights before creating your pet portrait, to find a brand that doesn’t buckle or thin when you’re drawing.
Always make sure to invest in an acid-free paper to prevent the final product from becoming brittle or yellowing over time.
Always Use a Reference Photo
Starting a new portrait isn’t the easiest task, but it’s made exceptionally more difficult if you’re trying to perform the task blindly. Try to find a well-lit photograph that highlights the pet’s features clearly. High-resolution images are easiest to work with, especially when you’re first starting out.
If you’re working with a color medium, make sure to print two or three photographs to reference (especially if you’re trying to get the portrait true to life. If you’re working with black and white, having a color reference and a black and white photograph can be helpful in pinpointing where your darkest and lightest areas are on the pet.
Get the Initial Sketch Accurate
The only way you’re going to be successful at getting your pet portrait is by ensuring the initial sketch you create is accurate and bears a strong likeness to your reference photo. Make sure you use a light pencil (ideally a 2B or higher) to draw a bare sketch of your pet. You’re not trying for details; you want the basic frame and positioning. Although you can include fur, be sure not to add tone to the image.
After you’ve finished the first sketch, take some time away from the drawing (even a few minutes can be helpful). Come back to the image and carefully critique it. Are the eyes properly spaced? Do the ears sit properly on the pet’s head? Is the nose the same as the photograph? As hard as it is to have to redo certain sections, if you’d like an accurate picture, this is the most important step to consider.
Add Shading in Small Sections at a Time
Once you have your initial sketch created, it’s time to add the details to your portrait. Work with small sections at a time to ensure the drawing is like the photograph you’re copying. If possible, imagine the image broken into small workable grids. Each grid will show you the highlights and dark spots within the photograph (you can even draw the lines on the photograph) as well as any small details you may otherwise overlook when reviewing the entire pet.
Be sure to draw what you see on the photograph, not what you think exists in your mind. Look carefully at the photograph and pinpoint different shading. You may think the stripe on the animal’s back goes down to the tail, but after carefully reviewing the image, you may find it’s two separate stripes that connect at the shoulders.
It’s All About the Eyes
Pay close attention to the eyes as you’re working, as they will make the portrait when it’s finished. Eyes emit large amounts of emotion within an image, whether it’s the sassy attitude your pet always gave you or the happy-go-lucky face after a day at the park. Look closely at any highlights within the eye area and how it reflects through the iris and pupil. Find any slight variations within the pupil and transfer them to your image. With the eyes done properly, your image is going to transform from a pet into your pet.
Please Help Us
IrishDogs.ie takes a lot of time, money and hard work to produce. But we do it because we believe our perspective matters because it might well be your perspective, too.
Our future could be much more secure with your help. Please SUPPORT us by clicking on the Donate Button at the Top Right of your screen.
Quick Search
Donate
Latest Dog Pods
- Tips on How to Stop Your Dog from Biting
- Beware - Not All Advertised Dog Rescues Really Are! How Can You Know The Truth?
- Helpful Tips For Dog Obedience Problems
- How to Keep Dogs From Eating Poop
- Dog Grooming Tips - A General Overview of the Very Basics of Dog Grooming
- Recognising Different Types of Dog Obedience Problems
- 5 Important Tips On Feeding A Puppy